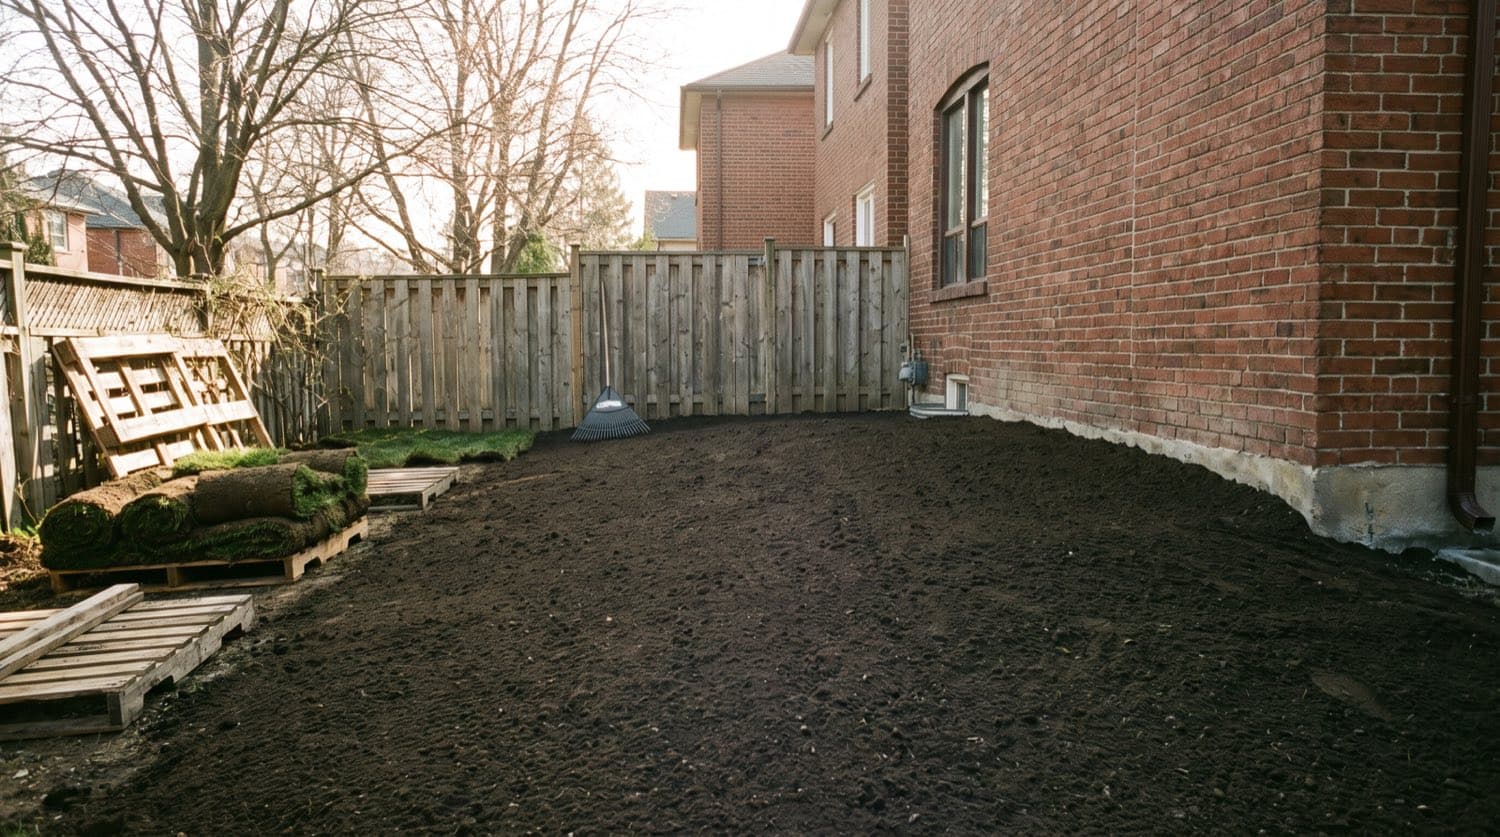
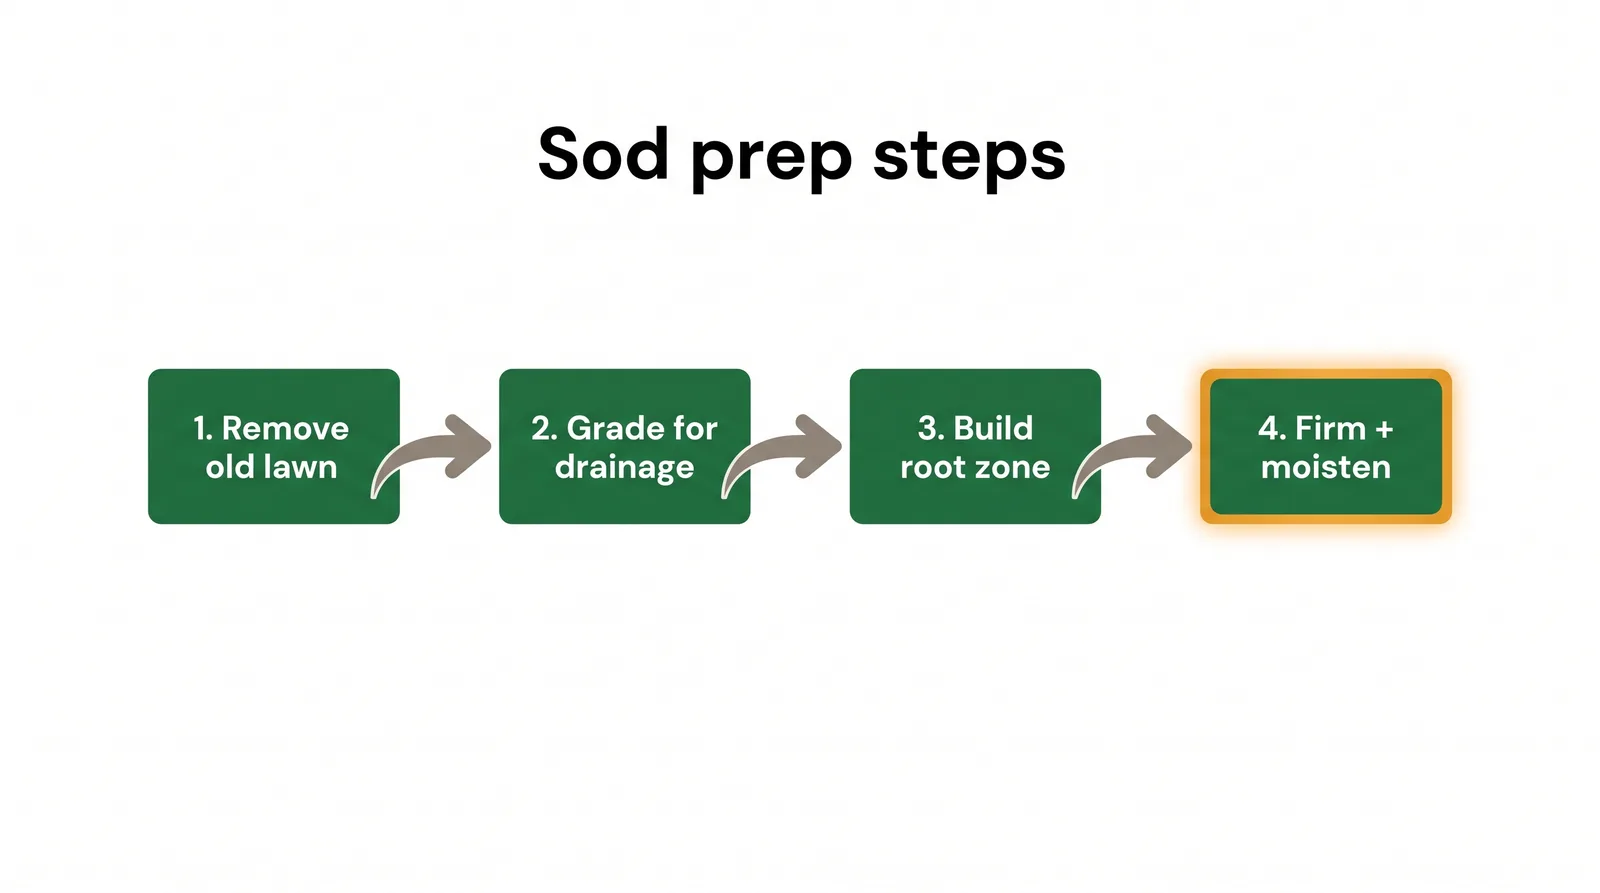
Answer First: Preparing a yard for sod comes down to four things: remove the old lawn, grade a 1 to 2% slope away from the house, build a 4 to 6 inch workable root zone by loosening the subsoil and adding 2 to 4 inches of topsoil, then firm, settle, and moisten before laying. In the GTA, topsoil runs about $300 to $500 per 1,000 sq ft supplied and spread, and the best time to do it is spring or early fall (Purdue; Michigan State). Get the prep right and cheap sod thrives; get it wrong and premium sod fails.
Sod is the easy part. It is the couple of days of dirt work before the first roll goes down that decide whether you get a lawn or a lumpy, poorly rooted disappointment. Skip the grading and you will see every low spot after the first rain. Skip the root zone and the sod sits there, green for a month, then thins out.
Why does sod prep matter so much?
Because sod is only as good as the soil under it. A roll of sod is a thin mat of grass and roots; it has almost no soil of its own, so it has to root down into whatever you laid it on within its first few weeks. Lay it on hard, compacted, or dead ground and the roots never take, no matter how healthy the sod looked on the pallet.
Prep also fixes the two problems you cannot correct later: drainage and level. Once the sod is down, a slope that runs water toward the house or a dip that holds a puddle is locked in. The time to solve both is now, with the soil still open.
Quotable: Sod is a thin mat with almost no soil of its own, so it lives or dies on the root zone beneath it. Drainage and level are set during prep and cannot be fixed once the sod is laid.
Step 1: Remove the old lawn
Start with bare, loosened ground, not a layer of dead grass. Strip or kill the existing lawn so the new sod roots into soil, not thatch. Standalone removal runs about $0.25 to $2.00 per square foot in the GTA, and it drops sharply when bundled into the sod job because the crew and disposal are already on site.
Then loosen the top couple of inches of subsoil. Tilling to at least 2 inches breaks up compaction, lets the added topsoil bond to the subsoil, and opens the ground for roots, air, and water (Purdue). Our guide to grass removal and regrading covers the strip-and-haul step in detail.
Step 2: Grade for drainage
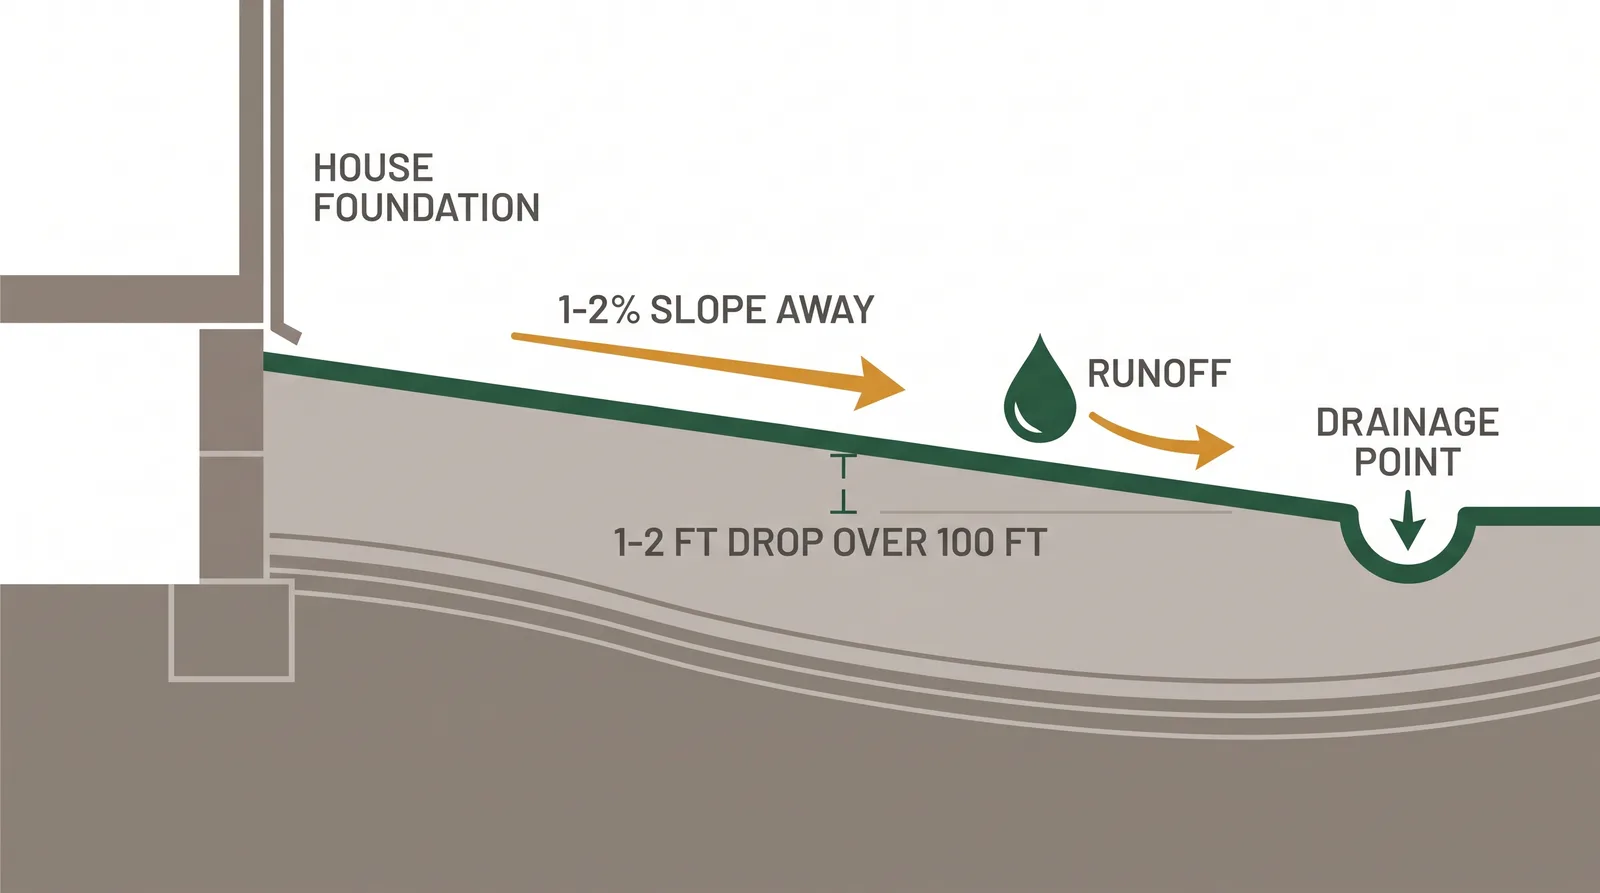
Set the slope before you set anything else. Rough-grade the yard so it falls away from the house at 1 to 2%, which is a drop of about 1 to 2 feet over a 100-foot run, and fill any low spots where water would pool (Purdue). This is the single most important thing prep does for the life of the lawn.
Two Toronto rules shape the grade. Under Municipal Code Chapter 629 you cannot regrade so stormwater drains onto a neighbouring property, and drainage has to be managed on your own lot. The working standard is that 1 to 2% fall away from the foundation for the first few metres, which keeps water off the basement without flooding the fence line.
Step 3: Build the root zone
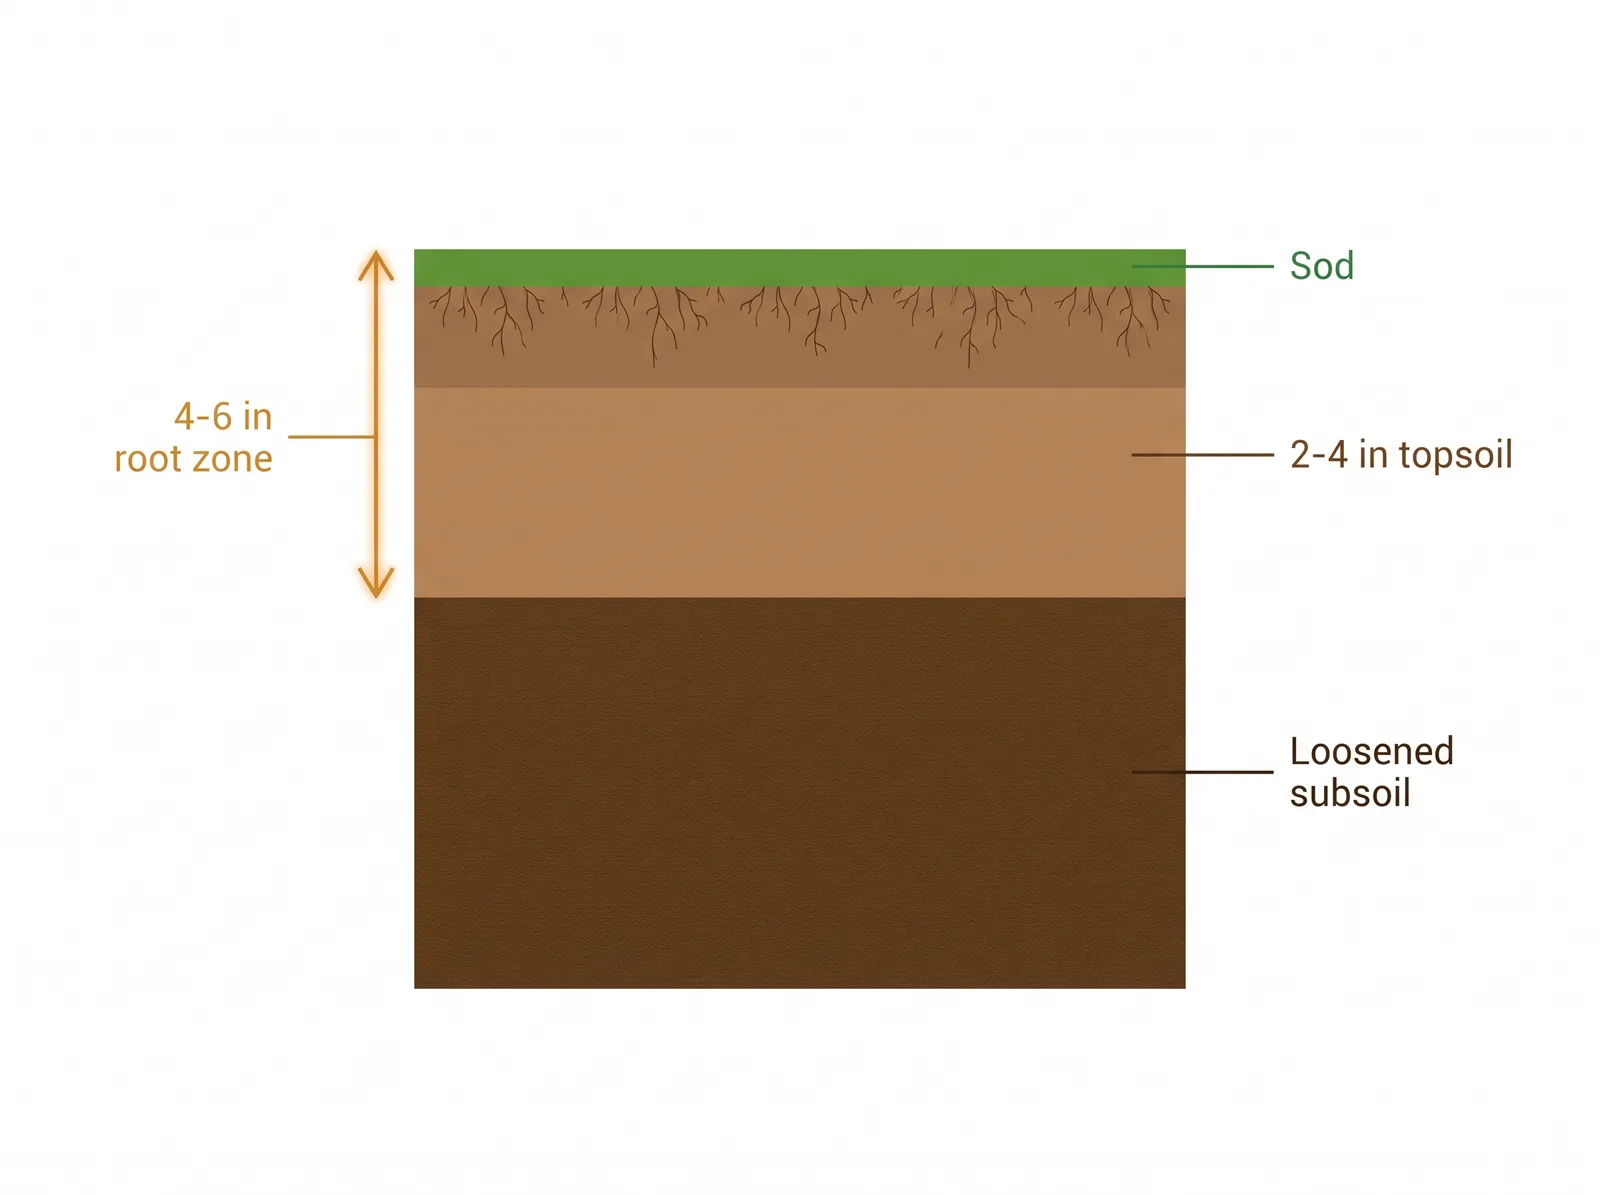
Give the roots 4 to 6 inches of workable soil to grow into. That total root zone is what sod needs to establish, and you reach it by loosening the subsoil and adding 2 to 4 inches of good topsoil on top (Michigan State). Poor construction-fill clay, common on GTA lots, needs the full amount; decent existing soil needs less.
The cost is mostly the topsoil:
| Item | Price | Unit | Source |
|---|---|---|---|
| Topsoil, supplied and spread | $300 to $500 | per 1,000 sq ft | Khanscapes (GTA) |
| Bulk screened topsoil, yard pickup | $36 to $125 | per cubic yard | Green Ridge Landscape Depot |
| Lawn grading / leveling before sod | $0.40 to $3.00 | per sq ft | SB Excavation |
Root zone — the 4 to 6 inches of loosened, workable soil beneath the sod that the new roots grow down into; too shallow or too compacted, and the sod cannot anchor or find water.
From the data: YardQuote tracks 113 sod-installation companies across the GTA, 102 of them with three or more reviews at an average of 4.80 stars, the highest-rated category we track (YardQuote tracking, July 2026). When you compare quotes, check that topsoil depth and grading are line items, because a bid that skips them is quoting a roll-out, not a lawn.
Step 4: Firm, settle, and final grade
Do not lay sod on fluffy, freshly dumped topsoil. After spreading it, let the soil settle for about a week, using rain or a light watering to help it firm up naturally (Purdue). Loose soil that settles unevenly after sodding leaves dips and air pockets under the turf.
Then finish the surface:
- Final grade the settled soil smooth, keeping that 1 to 2% slope and breaking up any clods.
- Firm it lightly so footprints barely show, then loosen just the top half-inch so roots can dig in.
- Moisten the soil right before laying so the sod meets damp earth, not dry dust, and have the sod laid and watered within about 30 minutes of delivery.
When should you lay sod in the GTA?
Time it for cool, damp weather. Spring (mid-April to June) and early fall (September to mid-October) are the ideal windows, because cooler air and more rain root the sod with far less watering. Ontario sod farms harvest roughly April to November, so winter installs are impossible.
A midsummer install is not doomed, but it is work: July and August sod needs daily watering for two to three weeks to survive the heat. If your municipality runs a summer watering schedule, new sod usually qualifies for an exemption, but check first. Whenever you lay it, prep the ground in the days before so the sod goes down onto a finished, moistened grade.
If you have not chosen a grass yet, our comparison of tall fescue versus Kentucky bluegrass covers which suits your yard, and once the sod is down, new sod care for the first 30 days takes it from there. You can compare installed pricing on the sod installation cost page or browse sod installers in Etobicoke and other GTA areas.
Want the prep and the sod done right the first time? Request a quote and compare up to three vetted local pros side by side, with grading and topsoil broken out as line items. Your contact details only go to the one you pick.